This article will detail how to perform the most common tasks with the
windows firewall on Windows Server 2012. This includes managing the
firewall settings and creating custom inbound and outbound firewall
rules.
Manage firewall settings
The Windows Firewall with Advanced Security is a host-based firewall that runs on Windows Server 2012 and is turned on by default. Firewall settings within Windows Server 2012 are managed from within the Windows Firewall MMC (Microsoft Management Console). To review and set Firewall settings perform the following:-
Open the Server Manager from the task bar.
-
In the right-hand side of the top navigation bar, click Tools and select Windows Firewall with Advanced
Security.
-
First review the current configuration settings by selecting
Windows Firewall Properties from the MMC landing page. This allows
access to modify the settings for each of the three firewall profiles,
Domain, Private, and Public, as well as IPSec settings.
Applying Custom Rules
Custom Rules allow the finest level of control over inbound and outbound traffic to your Windows Server 2012.-
If you have not already done so, load the Windows Firewall MMC by
opening the Server Manager from the task bar, clicking the
Tools menu, and selecting Windows Firewall with Advanced
Security.
-
Select either Inbound Rules or Outbound Rules under Windows Firewall with Advanced
Security on the left side of the management console.
Note: This will provide a listing on each of the currently configured firewall rules. Rules that are currently enabled are denoted by green checkbox icon, while disabled rules display a grey checkbox icon. Right-clicking a rule will allow you toggle enable/disable. -
From the right side of either the Inbound Rules or Outbound Rules tab click New Rule.
The new rule wizard launches.
-
Select Custom from the Rule Type radial button and click Next.
-
Select the Program association for the Custom Firewall Rule as either All programs or specify the path to a program and click Next.
-
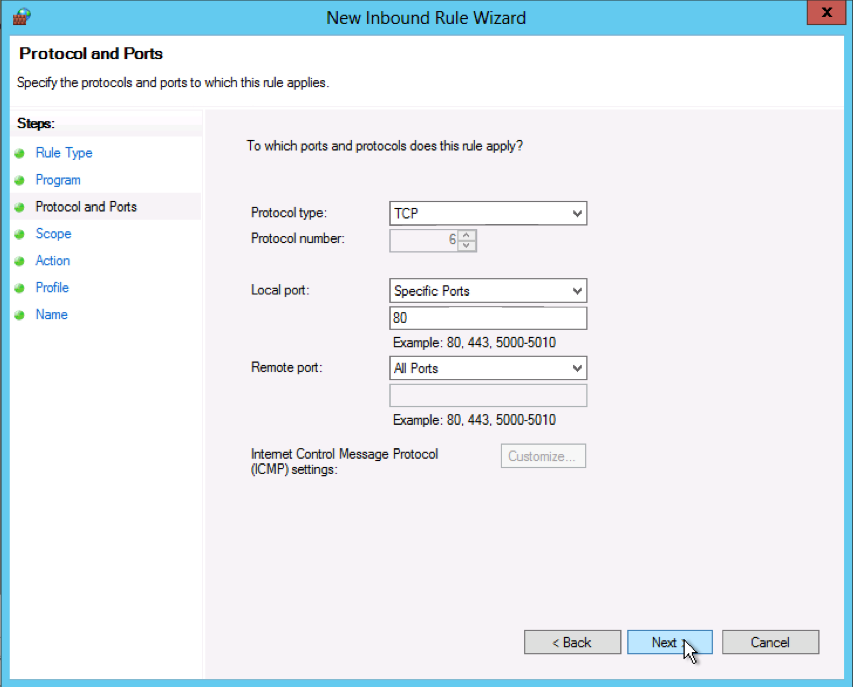
From the Protocol type field select the protocol type and click Next.
Note: This walkthrough uses TCP on port 80 (HTTP) for example purposes.
-
Select an IP address association for both local and remote addresses and click Next.
-
For traffic matching the IP address(es) you specified in the previous step, select whether to Allow the connection, Allow the connection if it is secure, or Block the connection and click Next.
Note: If you choose to allow the connection if it is secure, you can customize this further by clicking Customize. -
Select which profiles you want to associate with the custom rule, Domain, Public, or Private, and click Next.
-
Provide a name for your Firewall rule and an optional description and click Finish.
-
After you finish creating the rule, it is automatically enabled.

 Subscribe to email feed


