Pages

Banner 468

Tuesday, 19 July 2016

Install Active Directory Domain Services (ADDS) Role

0 comments
 

Install Active Directory Domain Services (ADDS) Role

Launch Server Manager
Click Add Roles and Features


Click Next

Select Role-based or feature-based installation and press Next

Since I am installing my forest locally I will select “Select a server from the server pool”
Select the server, in my case its DC2012
Press Next

Check off Active Directory Domain Services


When you check off Active Directory Domain Services a dialog window will pop up
Press Add Features

Press Next

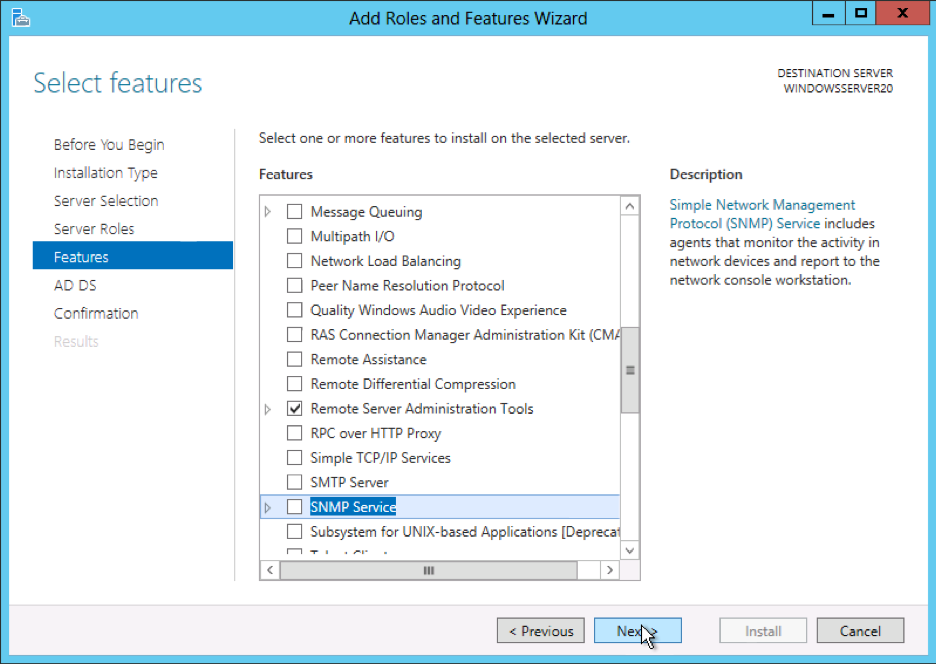
Press Next on the features section, you do not need to check anything off here.
Some things will be checked off because you selected Active Directory Domain Services in the last section.

Read the important things to note about this installation.
Press Next

Press Install

Installation will complete. Press Close

Configure ADDS Forest and Domain

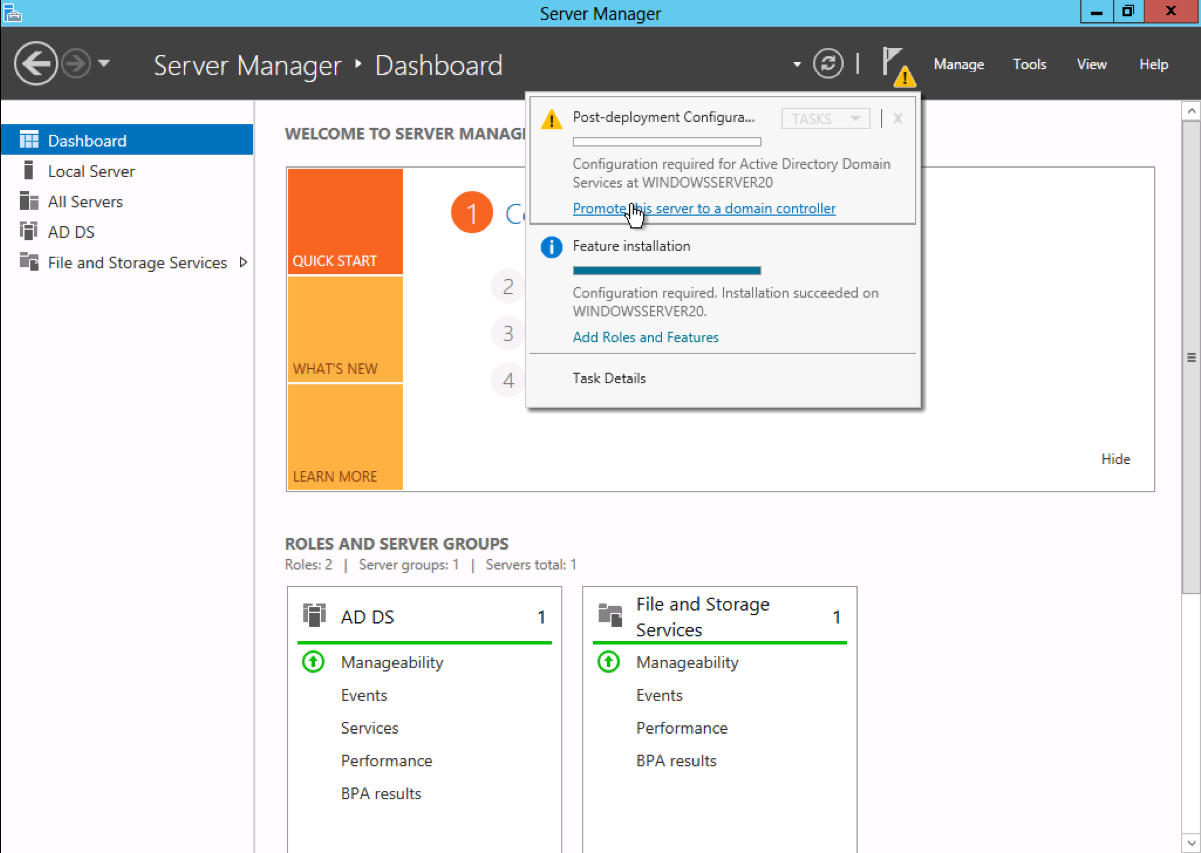
Next time your launch Server Manager. You will see a notification icon. Press the exclamation point. Select Promote this server to a domain controller


Warning: Do not create new Active Directory forests with the same name as an external DNS name. For example, if your Internet DNS URL is http://contoso.com, you must choose a different name for your internal forest to avoid future compatibility issues. That name should be unique and unlikely for web traffic. For example: corp.contoso.com.
Select Add a new forest
Specify the root domain name, in my case its pintolab.net
Press Next

In my new lab all servers will be Windows Server 2012. So I will be setting the functional level to Windows Server 2012. To understand more about Functional Levels please visit: http://technet.microsoft.com/en-us/library/cc771294.aspx
I will select Domain Name System (DNS), because ADDS needs DNS. This machine will function as the DNS server for the whole forest.
Enter a password for Directory Services Restore Mode (DSRM)
Press Next

Press Next. If there was an existing DNS server you would be able to change this option.

I like to set my domain name to 8 characters or less so that the NetBIOS name is the same as the domain name. If my domain name was longer, it would have truncated it. You can however make this anything you want. More information on NetBIOS Domain Names: http://technet.microsoft.com/en-us/library/cc961556.aspx
Press Next

Press Next

Press Next

Press Install
In my case I got a couple of warnings. The most important warning was the one saying I am using DHCP instead of an assigned IP Address. It’s important to make sure your Domain Controller and DNS Servers use static IP’s.

After Installation, Press Close

Setup will reboot the server, you will notice that the domain name is now in front of the username

One thing to take note of is that when DNS gets installed it will point the preferred DNS Server to itself and within DNS it will use the DNS Server that was in there before as a forwarder.


Managing Active Directory


Open Server Manager
Select AD DS
Right Click the Server Name, I find this is the quickest way to get to the Management Tools, since they removed the good ole start menu.

When you right click the server name you should see the familiar AD tools.

Active Directory Users and Computers thankfully has the same look and feel as previous versions.

 
Readmore...

Install Active Directory on Windows Server 2012

0 comments
 
This article will walk you through setting up the Active Directory Role on a Windows Server 2012. This article is intended to be used for those without an existing Active Directory Forest, it will not cover configuring a server to act as a Domain Controller for an existing Active Directory Forest.
Note: For information on setting up the Active Directory Domain Services (AD DS) on Microsoft Windows Server 2008 R2 Enterprise 64-bit (W2K8), see Install Active Directory Domain Services on Windows Server 2008 R2 Enterprise 64-bit.

Install Active Directory

  1. Open the Server Manager from the task bar.
  2. From the Server Manager Dashboard, select Add roles and features.
    This will launch the Roles and Features Wizard allowing for modifications to be performed on the Windows Server 2012 instance.
  3. Select Role-based or features-based installation from the Installation Type screen and click Next.
    Note: Roles are the major feature sets of the server, such as IIS, and features provide additional functionality for a given role.
  4. The current server is selected by default. Click Next to proceed to the Server Roles tab.
  5. From the Server Roles page place a check mark in the check box next to Active Directory Domain Services. A notice will appear explaining additional roles services or features are also required to install domain services, click Add Features.
    Note: There are other options including, Certificate services, federation services, lightweight directory services and rights management. Domain Services is the glue that holds this all together and needs to be installed prior to these other services.
  6. Review and select optional features to install during the AD DS installation by placing a check in the box next to any desired features, and then click Next.

  7. Review the information on the AD DS tab and click Next.
  8. On the Confirm installation selections screen, review the installation and then click Install.
    Note: The installation progress will be displayed on the screen. Once installed, the AD DS role will be displayed on the ‘Server Manager’ landing page.

Start remote registry service

Before promoting the server to domain controller, the remote registry service must be started.
  1. Click Start > Control Panel.
  2. Under Services, right-click Remote Registry and open the Properties menu.
  3. From the *Startup type:** drop-down menu, select Automatic.
  4. Under Service Status, select Start.
The remote registry service will start.

Configure Active Directory

Once the AD DS role is installed the server will need to be configured for your domain.
  1. If you have not done so already, Open the Server Manager from the task bar.
  2. Open the Notifications Pane by selecting the Notifications icon from the top of the Server Manager. From the notification regarding configuring AD DS, click Promote this server to a domain controller.

  3. From the Deployment Configuration tab select Add a new forest from the radial options menu. Insert your root domain name into the Root domain name field, and then click Next.
  4. Select a Domain and Forest functional level, and then input a password for the Directory Services Restore Mode (DSRM) in the provided password fields.
    The DSRM password is used when booting the Domain Controller into recovery mode.
    Note: The selection made here will have lasting effects to features and server domain controller eligibility. For further information on Domain/Forest functional levels, see official Microsoft documentation.
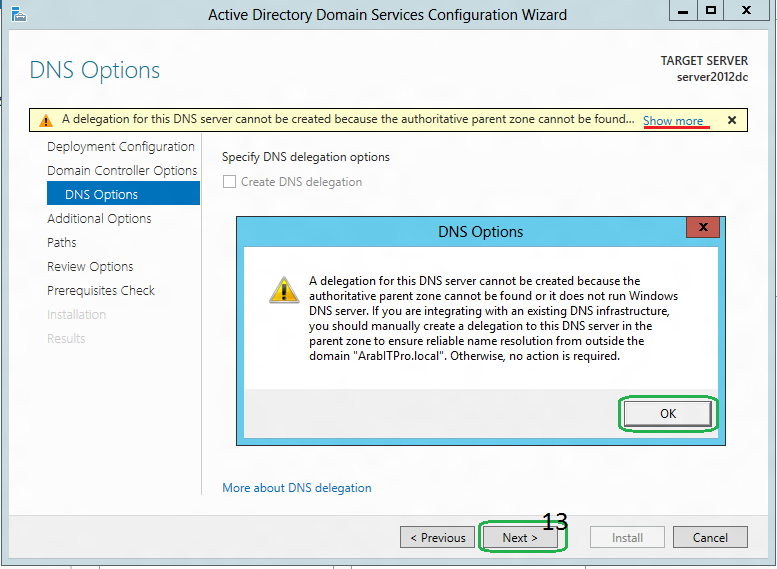
  5. Review the warning on the DNS Options tab and select Next.
  6. Confirm or enter a NetBIOS name and click Next.
  7. Specify the location of the Database, Log files, and SYSVOL folders and then click Next.
  8. Review the configuration options and click Next.
  9. The system checks to ensure all necessary prerequisites are installed on the system prior to moving forward. If the system passes these checks, proceed by clicking Install.
    Note: The server automatically reboots after the installation is complete.
After the server reboots, reconnect to it via RDP. Congratulations on successfully installing and configuring a Active Directory Domain Services on Windows Server 2012.
Readmore...
Friday, 15 July 2016

Computer Networking Tutorial

0 comments
 
A network is nothing more than two or more computers connected by a cable or by a wireless connection so that they can communicate and exchange information or data.
In other words " Network Means a collection of interconnected computer network of stand-alone computer. Commenting on the computer for the exchange of information. The connection can be over copper, fiber optic, microwave and satellite communications".
Obviously, computers can exchange information in other ways called the sneakernet or FloppyNet. Means that copy a file to a diskette and then walk the disk over to some other computer.
You can create a computer network by hooking all the computers in your office together with cables and installing a special network interface card (NIC) in each computer so you have a place to plug in the cable. Then you set up your computer’s operating-system software to make the network work. If you don’t want to mess with cables, you can create a wireless network instead. In a wireless network, each computer is equipped with a special wireless network adapter.
Lets start with,

A Simple Network Structure


Above figure shows a simple network with three computers and a Printer. You can see that all devices are connected with network cables to a central network device called a Network Router. The printer in this network can be used by all the PCs. Also the figure show you how the Wireless network Works, the Notebook and the Computer connected with the wireless router by wireless adapters which equipped with them.
Network Stations: May be terminal, computers, telephones or other communication devices. They are also called HOST\END SYSTEMS. The hosts are connected to communication subnet or subnet. They carry messages from host and consist of switching elements and transmission lines. Transmission lines are also called CIRCUITS, CHANNELS, TRUNKS, move bits between the machines.
The switching elements are specialized computers used to connect two or more transmission lines. The purpose of the switching element is to choose outgoing line and forward the data arriving on an incoming line. All traffic to/from the host has to go via its IMP. They are also known as PACKET SWITCHING NODES, INTERMEDIATE SYSTEM OR DATA SWITCHING EXCHANGES.
Subnet is the collection of the communication lines and routers but not the host. The set of nods to which stations attached is the boundary of the communication network. The collection of routers and communication lines moves packets from source host to the destination host.
Network structure can be thought with
   - Data terminal equipment (DTE).
   - Data circuit terminating Equipment (DCE) concept.
Most digital data processing device have limited data transmission capacity and limited distance of data transmission. DTE is the end user machine, generally refers to (Devices) terminals and computers.
Example: Email terminal, workstation, ATM in a bank, sales terminal in a departmental store. They are not commonly connected directly to transmission medium.
DCE is used to connect the communication channel.
Example: modem. It interacts with DTE and provides an interface of DTE to communication network transmits and receive bits one at a time over the communication channel.
To specify the exact nature of interface between DTE and DCE various standards and protocols have been developed. DCEs and DTEs are connected in two ways. A high degree of cooperation is essential in DTE-DCE combination, as data and control information is to be exchanged. They can be connected in two ways
   - Point to point configuration: Here only two DTE devices are in the channel
   - Multidrop configuration: Here more than two devices are connected to the same communication channel.


This will provide the basic technology concepts required for understanding networking. The following are the lessons how we categorized Computer Network.
Browse Topics

Readmore...
Friday, 4 April 2014

Windows Server 2012 Domain Controller

0 comments
 
In Windows Server 2012, dcpromo has been deprecated.
In order to make the windows server 2012 domain controller we will install ADDS (Active Directory Domain Services) role from the server manager on Windows Server 2012.
First we will change the server name let say server2012dc and  the IP address 10.10.21.1 (try to avoid using default 192.168.0.1)


INSTALLING AD DS ROLE

“Before You Begin” screen provides you basic information such as configuring strong passwords, IP addresses and Windows updates.
On Installation Type page, select the first option “Role-based or Feature-based Installation“.
Scenario-based Installation option applied only to Remote Desktop services.
On the “Server Selection” Page, select a server from the server pool and click next.
To install AD DS, select Active Directory Domain Services in turn it will pop-up to add other AD DS related tools. Click on Add Features.
After clicking “Add Features” above, you will be able to click “Next >” as shown in the screen below.
On the “Select Features” Page, Group Policy Management feature automatically installed during the promotion. Click next.
On the “Active Directory Domain Services” page, it gives basic information about AD DS. Click Next.
On the “Confirmation” Page, You need to confirm this to continue with this configuration. It will provide you an option to export the configuration settings and  also if you want the server to be restarted automatically as required.
After clicking “Install” the selected role binaries will be installed on the server.

After “Active Directory Domain Services” role binaries have been installed and now it is time to promote the server to a Domain Controller.


TechNet Article:

PROMOTING WINDOWS 2012 SERVER TO DOMAIN CONTROLLER

To create a new AD forest called “ArabITPro.local”, select add a new forest.
Type the name ArabITPro.local
Specify the FFL, DFL, whether or not it should be a DNS Server and also the DSRM administrator password. As you can see, it has selected the GC option by default and you cannot deselect it. The reason for this is that is the very first DC of the AD forest and at least one needs to be a GC.
DNS delegation warning.
Checks the NetBIOS name already assigned.
Specify the location of the AD related folders and then click next.
Summary Of All Installation Options/Selections.
Click View script for single command  line PowerShell script for dcpromo.
Before the actual install of AD, all prerequisites are checked. If All prerequisite checks are passed successfully then click Install.
When you click Install, DNS and the GPMC are installed automatically.
After the promotion of the server to a DC finished server restart automatically.
Once the server is booted and you logon to it, click on  Server Manager | Tools ,  will notice that following have been installed :
   •   Active Directory Administrative Center
   •   Active Directory Domains and Trusts
   •   Active Directory Module for Windows PowerShell
   •   Active Directory Sites and Services
   •   Active Directory Users and Computers
   •   ADSI Edit
   •   DNS
   •   Group Policy Management

Readmore...