
Preface:
This is basically the same procedure as the Windows 2000 tutorial. Some things to note about adding a Windows XP
computer to a domain are the following:
-
You need Windows XP Professional to join a XP computer to a domain. Home can't be used fully for this
-
You will loose the "fancy" log on screen and you will receive the "classic" log on screen instead. This is for security and cannot be changed, unless you revert to workgroup mode
-
You will loose the "Fast User Switching". This cannot be restored, except by reverting back to workgroup mode.
Method:
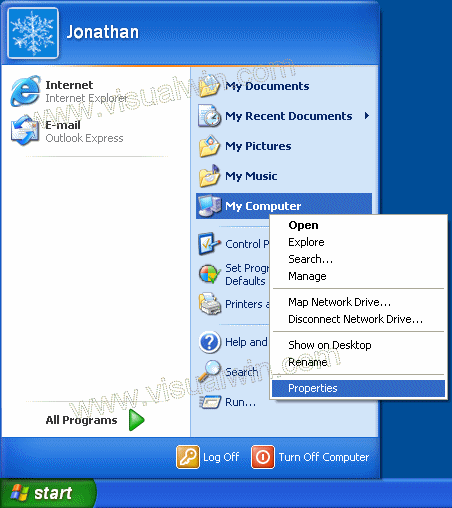
Click Start, right click "My Computer" and click "Properties"
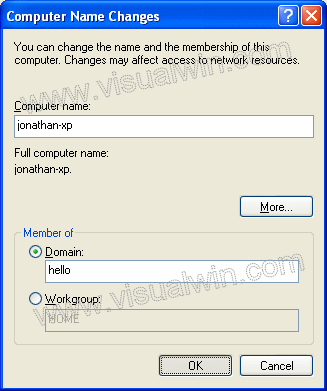
Go to the "Computer Name" tab and click "Change..."

Select the "Domain" radio button then put in your domain name,
not including the . extension (in my example I used the domain "hello.test" but
when joining the computer to a domain, I will only type "hello")
Press "OK". Then you will be presented with a user name
and password prompt. Enter the user name and password of a Domain
Administrator
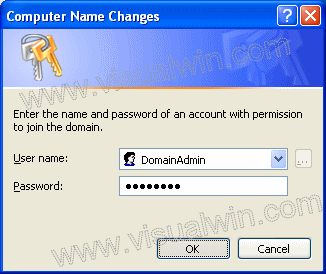
Press "OK" and after a minute or two you will receive a message
welcoming you to the domain. Then you will receive a message telling you
that a reboot is required, click "OK" to that, and the properties window.
Then click "Yes" when you are prompted to reboot.
And we're finished. You have just learnt how to add a
Windows XP computer to a Windows Server 2003 domain
Additive:
After the XP computer boots to Control-Alt-Delete you may need
to change it from logging onto itself (which will use the local info) to
logging onto the domain. To do this, press Ctrl-Alt-Del, then the "Options
>>>" button on the log on screen. Then select the domain from the
drop-down box
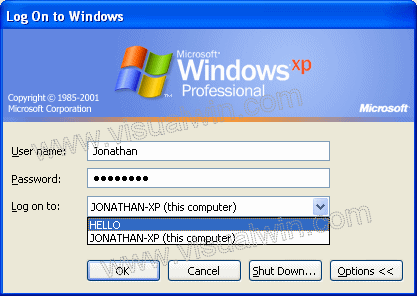
After that you can log on using domain credentials
 Subscribe to email feed


