
Preface:
One of the greatest features of Windows Server 2003 is its
ability to be a Domain Controller (DC). The features of a domain extend
further than this tutorial ever could, but some of its most well known features
are its ability to store user names and passwords on a central computer (the
Domain Controller) or computers (several Domain Controllers). In this
tutorial we will cover the "promoting" (or creating) of the first DC in a
domain. This will include DNS installation, because without DNS the client
computers wouldn't know who the DC is. You can host DNS on a different
server, but we'll only deal with the basics.
Method:
Click Start -> Run...

Type "dcpromo" and click "OK"

You will see the first window of the wizard. As it
suggests, I suggest reading the help associated with Active Directory.
After this, click "Next"

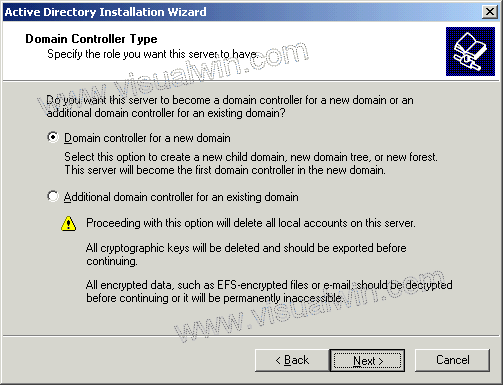
Click "Next" on the compatibility window, and in the next window
keep the default option of "Domain Controller for a new domain" selected, and
click "Next"
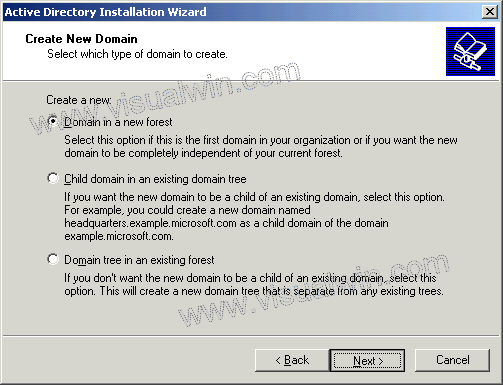
In this tutorial we will create a domain in a new forest,
because it is the first DC, so keep that option selected
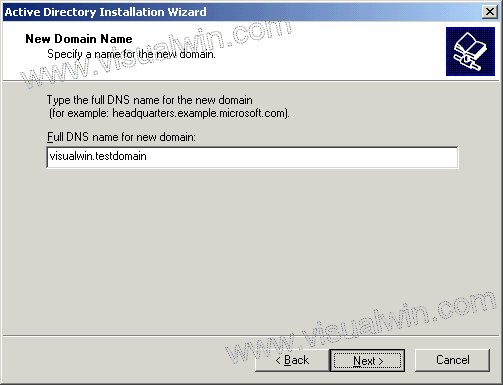
Now we have to think of a name for our domain. If you own
a web domain like "visualwin.com", you can use it, but it isn't suggested
because computers inside of your domain may not be able to reach the company
website. Active Directory domains don't need to be "real" domains like the
one above - they can be anything you wish. So here I will create "visualwin.testdomain"
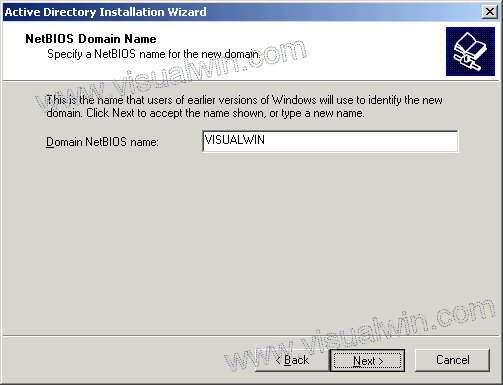
Now in order to keep things simple, we will use the first part
of our domain ("visualwin"), which is the default selection, as the NetBIOS name
of the domain
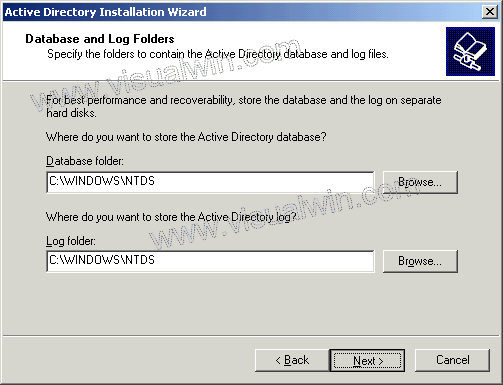
The next dialog suggests storing the AD database and log on
separate hard disks, and so do I, but for this tutorial I'll just keep the
defaults
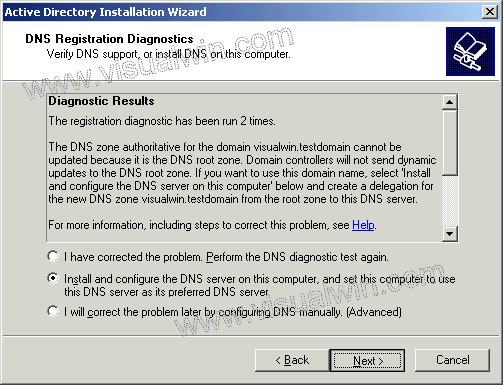
Now we will get a message that basically says that you will need
a DNS server in order for everything to work the way we want it (i.e., our "visualwin.testdomain"
to be reachable). As I mentioned earlier, we will install the DNS server
on this machine as well, but it can be installed elsewhere. So keep the
default selection of "Install and configure", and click "Next"
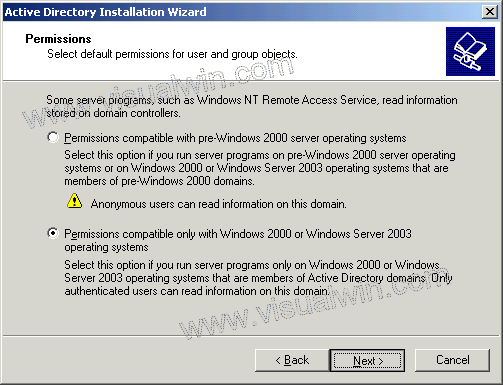
Because, after all, this is a Windows Server 2003 tutorial
website, we'll assume there are no pre-Windows 2000 servers that will be
accessing this domain, so keep the default of "Permissions compatible only with
Windows 2000 or Windows Server 2003 operating systems" and click "Next"
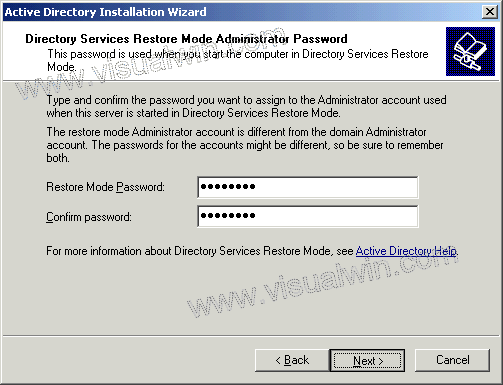
The restore mode password is the single password that all
administrators hope to never use, however they should also never forget it
because this is the single password that might save a failed server. Make
sure it's easy to remember but difficult to guess
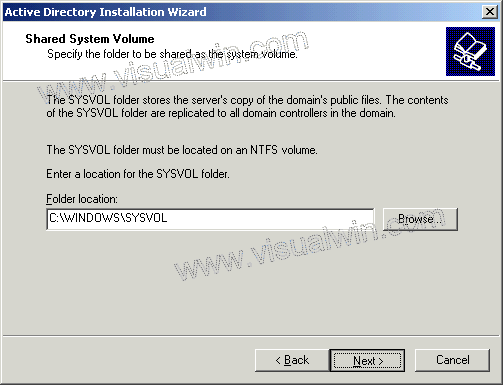
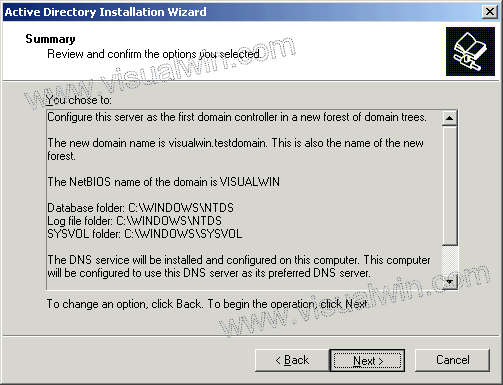
Now we will see a summary of what will happen. Make sure
it's all correct because changing it afterwards can prove to be difficult
After the previous next was clicked, the actual process occurs.
This can take several minutes. It's likely that you will be prompted for
your Windows Server 2003 CD (for DNS) so have it handy

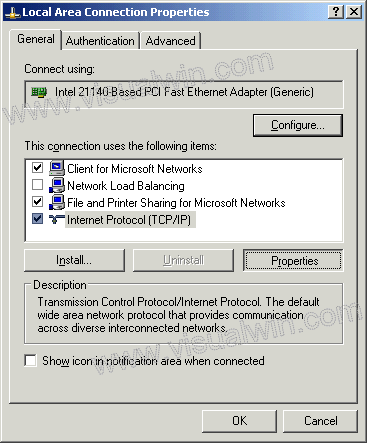
If your computer has a dynamically assigned address (from DHCP)
you will be prompted to give it a static IP address. Click ok, and then in
the Local Area Connection properties, click "Internet Protocol (TCP/IP)" and
then "Properties"
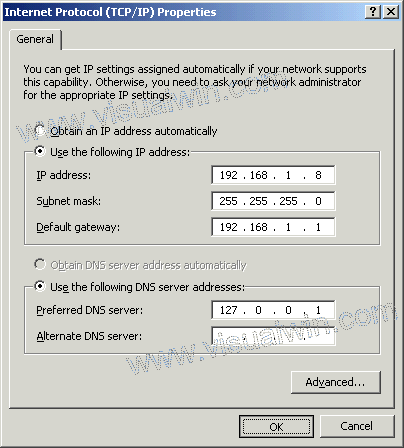
In the next window select "Use the following IP address" and
select the information that you will use for your domain (and 127.0.0.1 for the
primary DNS, because your computer will host DNS. I still suggest setting
up an alternate as well.) Click "OK" and then "Close" on the next window
And after a while you will see
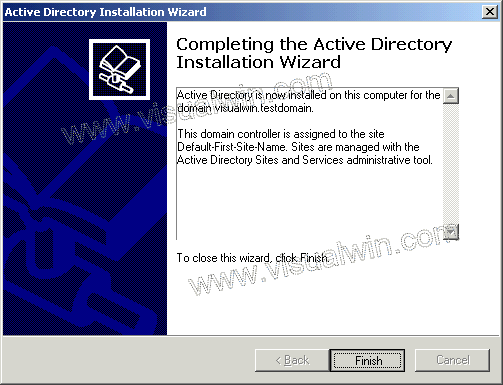
And we're finished.
 Subscribe to email feed


